
Review - Arduino Genuino 101 Review and Getting Started
I take a look at the Arduino Genuino 101 with the Intel Curie Processor and compare it with other blueooth boards. I also look at small demo projects for the same.
INTRODUCTION
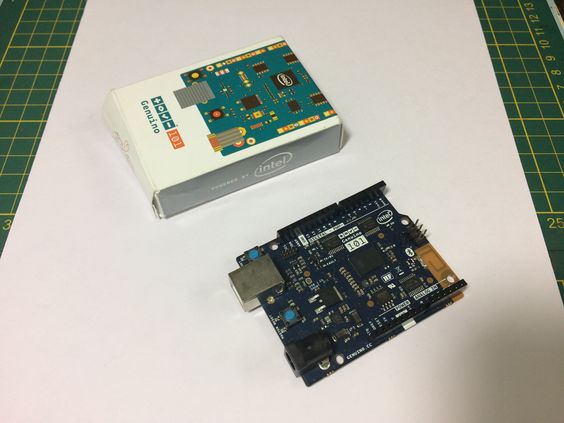
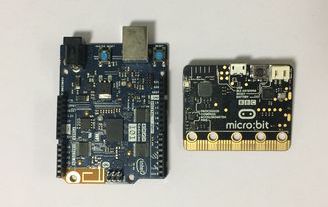
The Arduino Genuino 101 is the result of collaboration between Massimo Banzi and Intel and features the Intel Curie Processor. The board also features sensors such as accelerometers and gyroscopes and has BLE or Bluetooth Low Energy which enables communication with smart-phones etc. In this review I take a look at the hardware in detail and compare it with the BBC Micro bit and make some basic projects that can help the beginner get off the ground.
Basics
The Arduino Genuino 101 has the same form factor as the Arduino Uno and Leonardo. The processor runs two tiny cores, an x86 (Quark) and a 32-bit ARC architecture core, both clocked at 32MHz. The Intel tool-chain compiles your Arduino sketches optimally across both cores to accomplish the most demanding tasks. Unlike the AVR based boards where a compiled sketch run directly on the processor, the Genuino 101 run an RTOS which is open-sourced by Intel[1]. The other Technical specs are given next.
Technical specs
| Microcontroller | Intel Curie |
| Operating Voltage | 3.3V (5V tolerant I/O) |
| Input Voltage | (recommended) 7-12V |
| Input Voltage | (limit) 7-17V |
| Digital I/O Pins | 14 (of which 4 provide PWM output) |
| PWM Digital I/O Pins | 4 |
| Analog Input Pins | 6 |
| DC Current per I/O Pin | 20 mA |
| Flash Memory | 196 kB |
| SRAM | 24 kB |
| Clock Speed | 32MHz |
| LED_BUILTIN | 13 |
| Features | Bluetooth LE, 6-axis accelerometer/gyro |
| Length | 68.6 mm |
| Width | 53.4 mm |
| Weight | 34 gr. |
Software Support
The board can be programmed using the official Arduino IDE and in my testing I used Arduino version 1.6.12. The default setup comes with basic board support and you have to manually add the hardware BSPs.
Adding Board support to the Arduino IDE
The process of adding support packages to the IDE is simple and explained as follows.
Click on Tools -> Boards -> Board Manager
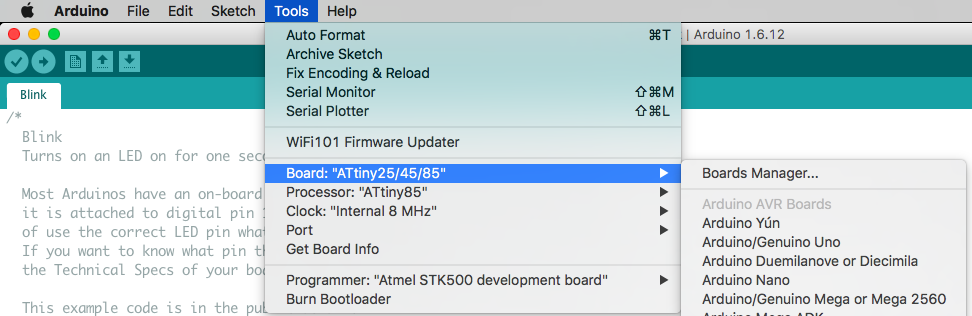
Scroll and find the ‘Intel Curie Boards’ from the list and click ‘Install’. This adds the board support
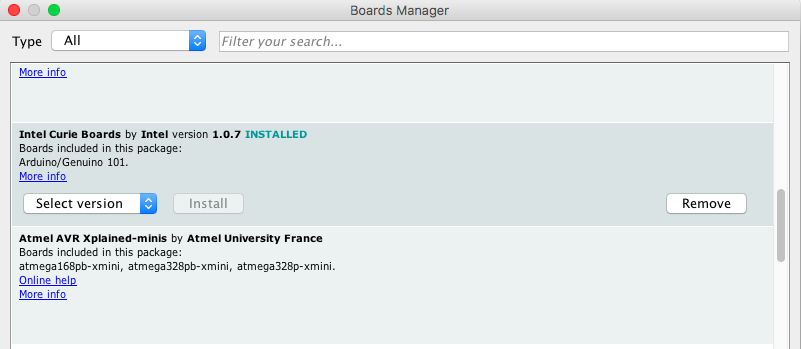
That’s it. This helps when you need to add or remove support and don’t want to download files from github and stuff.
The Competition
There are other players already in the market that are oriented towards the beginners. I would consider the BBC Micro bit to be a direct competitor to the Genuino 101 and a good one at that. The BBC Micro bit features a Cortex M0 processor with GPIOs and similar sensor and BLE.
It can be programmed using mBed for the programmer friendly types and Touch Develop for the kids who prefer the graphical programming path.
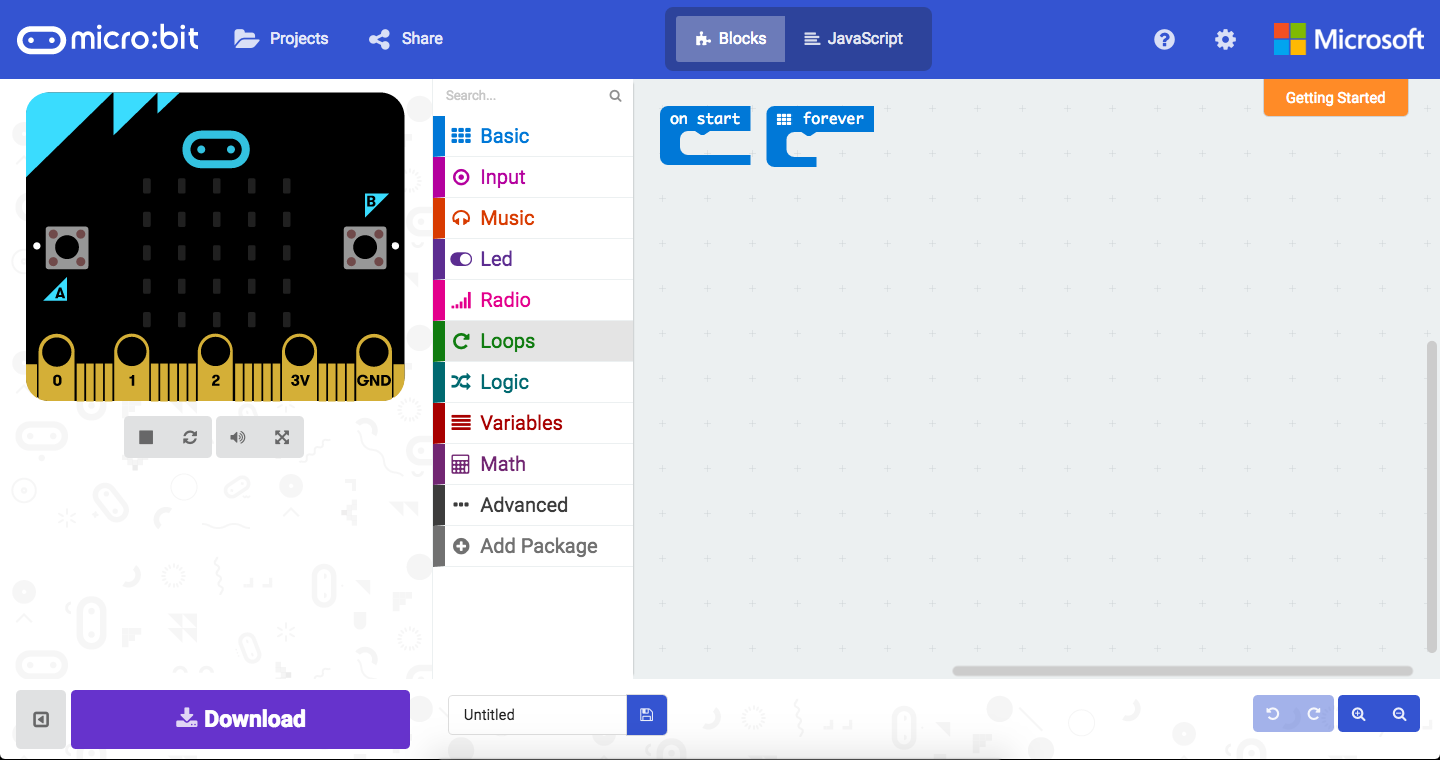
Unlike the Arduino which is targeted towards the hobbyist and maker, the BBC micro Bit is aimed towards teaching so its a better fit for the beginners. The nRF51 Cortex M0 give more advanced user the ability to fiddle with the BLE in more complicated ways. I suggest taking a look at my BBC Micro Bit Review where I made a line follower robot.
and
The Review
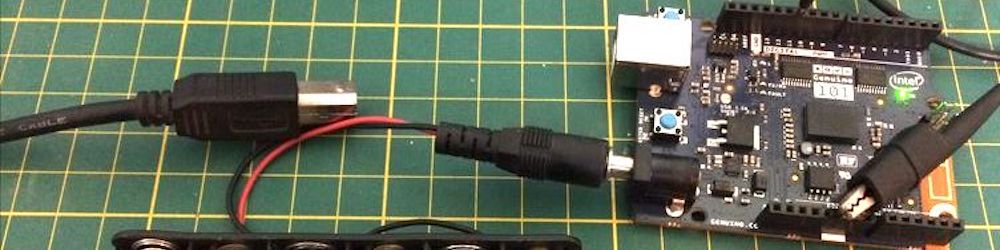
Getting started was simple enough and as outlined, adding board support was relatively easy. My workbench is usually one with a lot of tit-bits and I had to move the board around… a lot! I found that the board was not as rugged as its older cousins and as a result the power supply protection circuit collapsed without any warning.
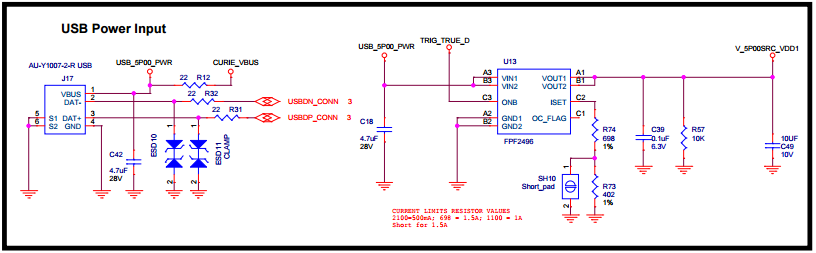
What that means is that I am no longer able to power up the Genuino 101 from USB. I can still power it from the DC Jack and I can still program it using the USB which means that the FPF2496 has seen its last working day. On the part of the documentation, the files are incomplete at best.

The documentation indicates the presence of Test Points however the board has no silkscreen nor is the associated documentation anywhere to be found. It is expected in the first iteration of the board however the community has not taken a shine to the board either and consequently very few discussions are available on the subject.
The software experience
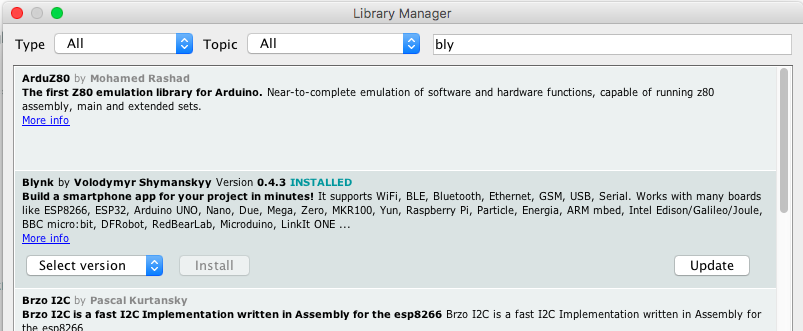
One of the most evolved features of the Arduino ecosystem is the Arduino Software libraries which allows for the reuse of code across projects and even boards and processors. The BSPs come with code examples and with the addition of the library manager, the importing of the same becomes easier.
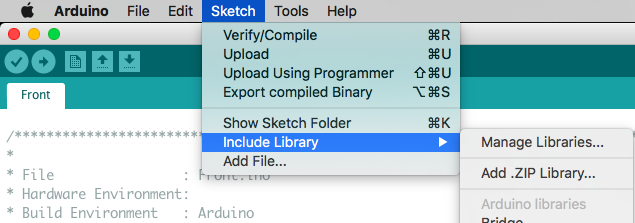
For the Genuino 101, using the on-board peripherals is a simple matter of
I ran a simple code to toggle a GPIO without any delays to find out how fast the software sketch was running. The result is shown below.
1
2
3
4
5
6
7
8
9
10
11
// the setup function runs once when you press reset or power the board
void setup() {
  // initialize digital pin LED_BUILTIN as an output.
  pinMode(12, OUTPUT);
}

// the loop function runs over and over again forever
void loop() {
  digitalWrite(12, HIGH);   // turn the LED on (HIGH is the voltage level)
  digitalWrite(12, LOW);    // turn the LED off by making the voltage LOW
}

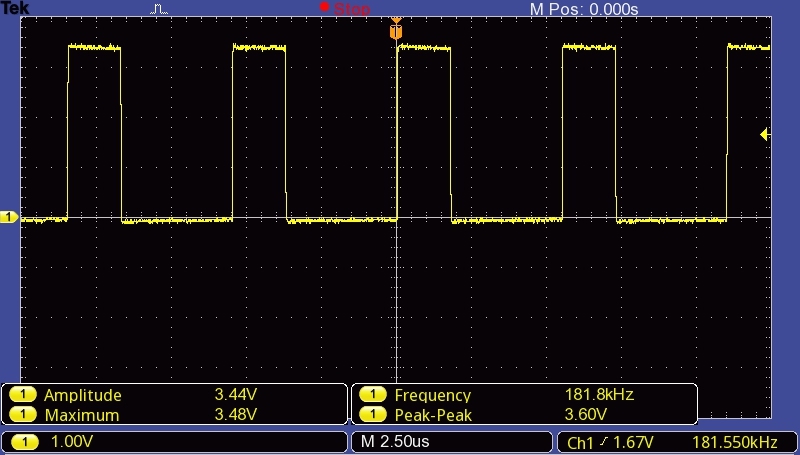
As you can see, I have to run the board from a battery pack but it still works. The result is a 180kHz wave is nothing close to the 32MHz system clock. The sketch probably runs in its own little container which means if you want to exploit the true capabilities, you would be better off exploring the RTOS and framework. For the beginner, the basic setup works pretty well though.
1
2
3
 #include "CurieIMU.h"
  //and then
 CurieIMU.begin();
The access to the peripherals is encapsulated in the ‘curie’ classes and functionality exposed via simple methods. The links to the details are as follows:
- CurieBLE - Interact with smart-phones and tablets with Bluetooth Low Energy (BLE).
- CurieIMU - Manage the on-board accelerometer and gyro.
- CurieTimerOne - Allows to use Timer functions.
- CurieTime - Allows to control and use the internal RTC (Real Time Clock)
That being said, there are many ways of developing with the 101. My initial proposal for this test was to create a project that recognises gestures however that project is already documented on the create-arduino page here.
Intel too has a page for the Arduino 101 that has further links to useful information but his makes the entire experience… scattered across the internet. I would like to see a more summarised documentation and this post could serve that purpose if updated on a regular basis.
In order to work with BLE, it is important to understand how BLE devices work. The explanation is beyond the scope of this document hence, I refer to the following links for the corresponding information.
If I HAD to explain BLE communication in summary, it would be…
‘BLE Communication is like a postbox message system. Once a connection has been established, the peripheral or BLE end node acts like a postbox where an internal process writes messages in predefined slots called characteristics. The client or application device such as laptop or smart-phone connects to the node which in this case would be the 101 and reads that characteristic or writes to it. The frequency of this transaction depends on the configuration and influences the power consumed.’
I leave the details to you to figure out as an excercise.
A simple BLE Project
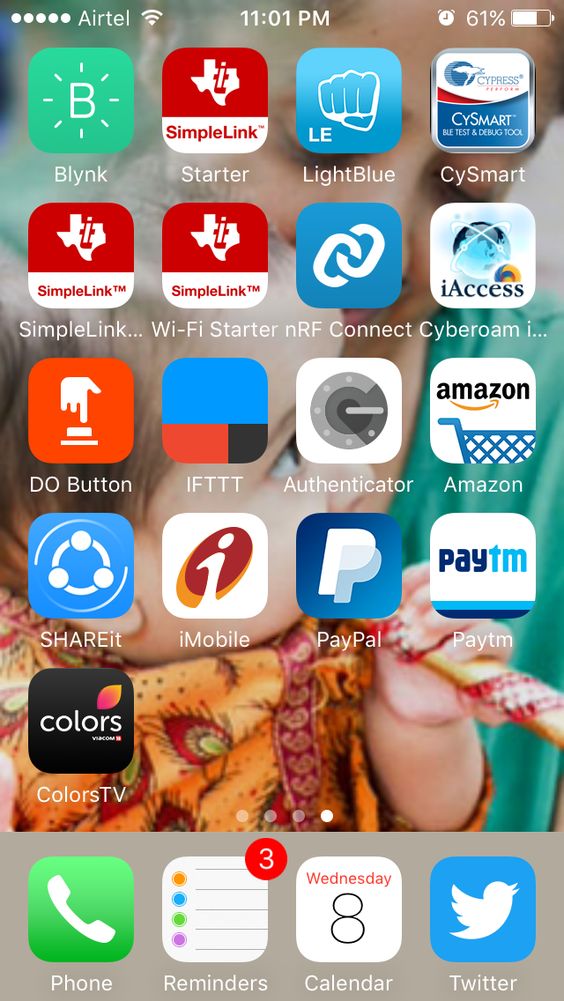
Unlike the blinking led project that is the ‘hello world’ of the hardware world, BLE projects are slightly different. For starters, Windows 7 and below don’t support Bluetooth 4.0 which means you either pay for Windows 10, buy a Mac or quite simply move to linux. I personally use a MacBook Air thanks to Element14 and a Ubuntu Mate Desktop alongside a Raspberry Pi3 Raspbian machine. The idea is to have all the bits and pieces together. You could also go with the option of the Smart-phone and for both the iOS and Android, I recommend downloading the Cypress BLE App. The nRF Connect App is also a favourite and comes highly recommended. If you have a better option, I am all ears - leave a suggestion in the comments.
So with the Cypress BLE App installed, it now time to start programming the Genuino 101
For the first test, we want to emulate a standard peripheral. A heart-rate monitor? Well I like to start smaller so lets go with the battery monitor example. Yes! It is available as an example and the details are given here.
The code starts by including the CurieBLE library which has all the necessary functions to help with BLE functionality. Next, a BLE Peripheral object is created. Next we add a service object. You can have more than one of these e.g. a battery monitor inside a heart-rate monitor. The text ‘180F’ is the service identifier and is a standard values taken from the BLE Gatt Specs
The BLEUnsignedCharCharacteristic class is used to create characteristic objects used to format information to be sent across the BLE connection. In this case we only created a batteryLevelChar with UUID from this list. This object will be used to send the battery information.
1
2
3
4
5
6
7
BLEPeripheral blePeripheral;       // BLE Peripheral Device (the board you're programming)
BLEService batteryService("180F"); // BLE Battery Service

// BLE Battery Level Characteristic"
BLEUnsignedCharCharacteristic batteryLevelChar("2A19",  // standard 16-bit characteristic UUID
    BLERead | BLENotify);     // remote clients will be able to
// get notifications if this characteristic changes
Visit this link for the complete table and list of services as well. Its safe to say that you can use a standard peripheral ID for your own evil purposes but its just bad manners. Who knows your 101 may wrongly connect to someone else’s phone and tell him his heart-rate is 325bps! Heart-attack! ;) Moving on…
Next the set methods will do exactly what their respective names say and the addAttribute method will add our service object as well as the characteristic object to the peripheral we initially created. the last method setValue is called everytime the value is to be updated
1
2
3
4
5
blePeripheral.setLocalName("BatteryMonitorSketch");
blePeripheral.setAdvertisedServiceUuid(batteryService.uuid());  // add the service UUID
blePeripheral.addAttribute(batteryService);   // Add the BLE Battery service
blePeripheral.addAttribute(batteryLevelChar); // add the battery level characteristic
batteryLevelChar.setValue(oldBatteryLevel);   // initial value for this characteristic
From there onwards its just a matter of monitoring an input and updating the characteristic. This example serves as a good starting point and allows you to do a number of things like read sensors etc.
More advanced projects can create custom peripherals and services and characteristics to allow for simultaneous reading and writing of values.
This is all well and good however if you show your mom/wife/girlfriend this project she will not exactly be impressed. And writing an Android/iOS app is not something you want to do right now. Though I am writing an article about creating a smart-phone app using Cordova, the plan is usually getting off the ground quickly. Hence my next recipe- keep reading.
Blinking an LED with Blynk
Blynk.cc is an app for IoT that has support for a large number of boards. At first they may not seem like a serious business but if you go into the details, it seems quite extensively researched. Their app can be downloaded from iTunes as well as the Android Play store and creating a login is easy and free.
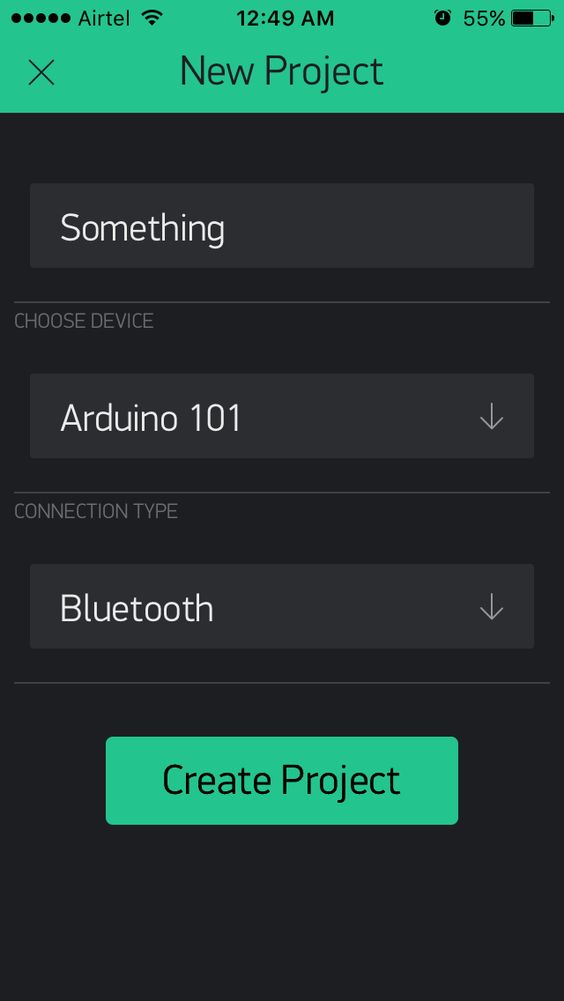
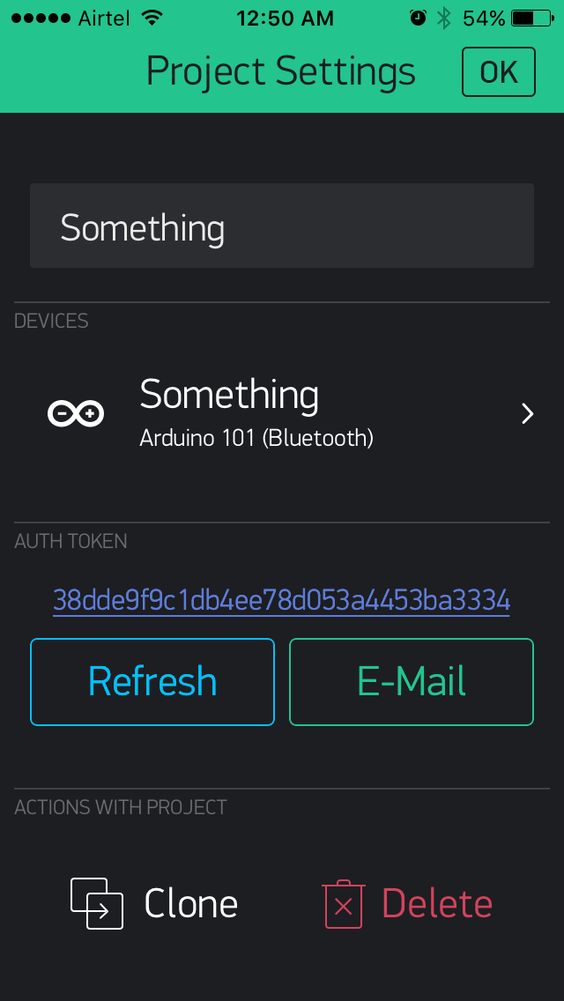
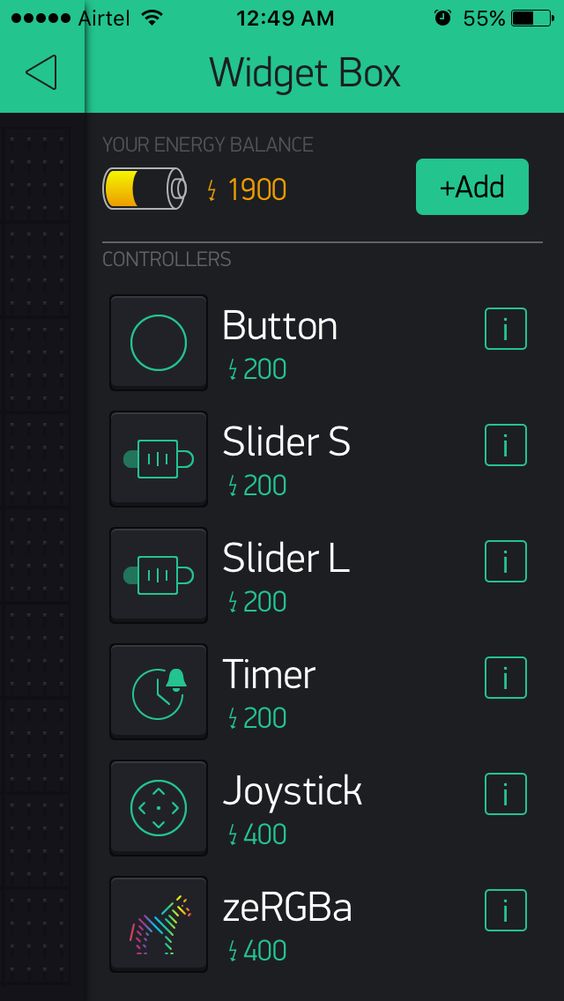
Once you have that out of the way, its time to create a simple application. Create a new project and name it something. Select the target board as the Arduino 101. Next add a button widget and a BLE widget. Click on the ‘Nut Icon’ on the top right to get the auth token and configure the button to D13 pin on the 101.
The next step is to get the 101 ready. In the arduino IDE -> File -> Examples -> Blynk … just take a look at the image below!
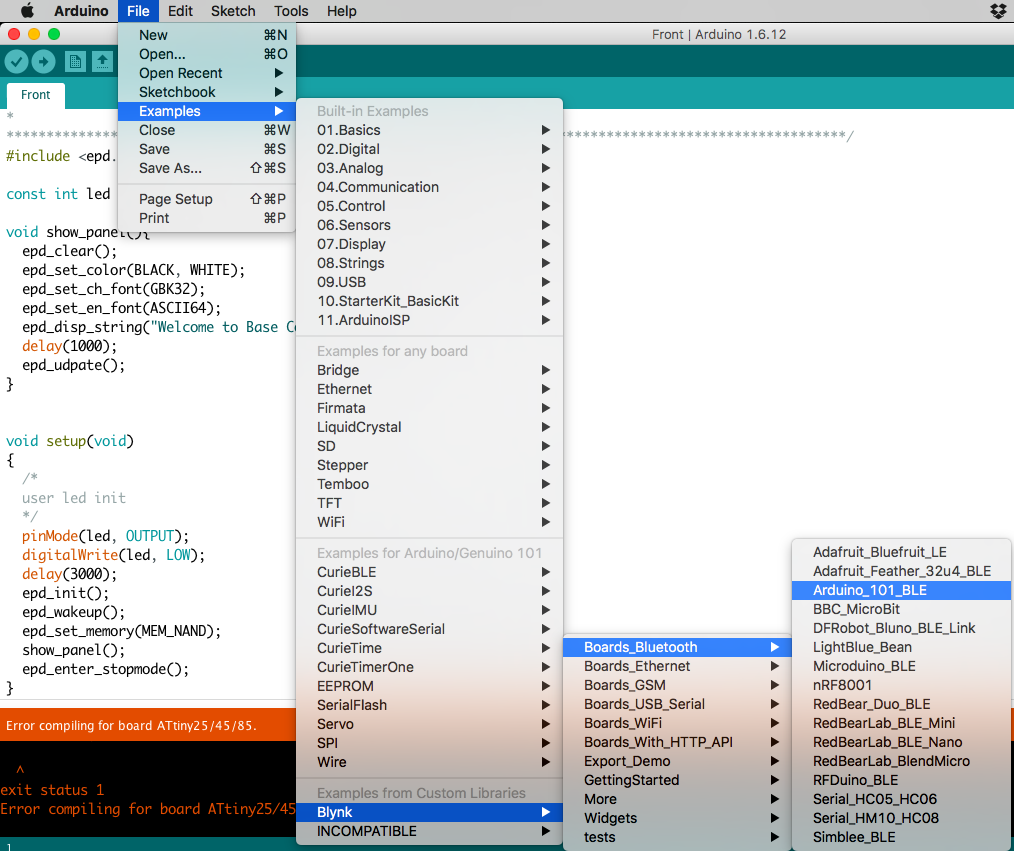
Paste or type the auth token in the field and compile-upload the code to your 101. Done! Its actually that simple and now you can connect your 101 via BLE to your phone and control an LED. Add a relay and you can control a light and so on and so forth.
There is nothing there to explain about the code because everything is encapsulated in classes and the Blynk library.
The same project can be done using the micro bit and mBed but that’s beyond the scope of this document as well. I have the code tested for that here
3D print a case
Like I said, the device is not very rugged and I highly recommend buying a case or 3D printing one yourself. There are tonnes of designs out there and I will update this post when and IF I produce a design of my own.
Conclusion
I initially proposed a project for this board but it seems there is already enough information of that kind out there. The Arduino 101 is a solid contender in the BLE device market and can be extremely helpful given its library support and other information. It’s not the cheapest nor is it for everyone. The BBC Micro Bit is just more bang for the buck in my opinion since it has all the features plus support material for kids. I have tried the mBed version on the BBC Micro Bit and felt is a bit complicated but more rewarding if you are trying to learn such things. For the general maker, the Arduino 101 is the perfect starting point for the next BLE controlled contraption.
References